All photos were taken by my lovely friend, Lacy, who patiently helped me document every single step of this process.
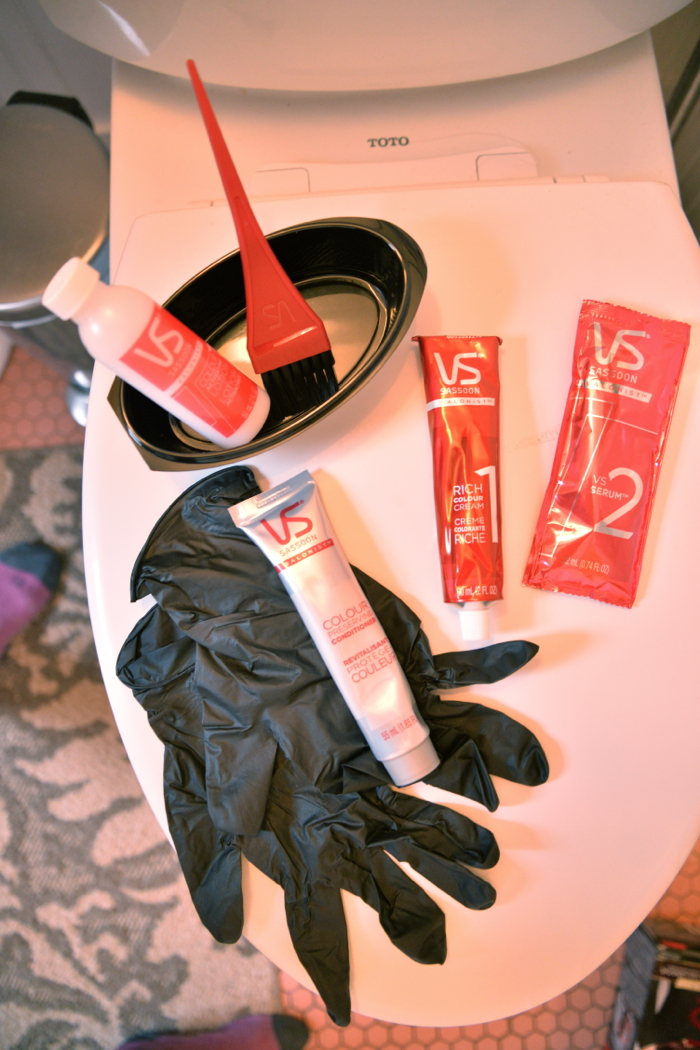
Hey everyone! So, I’ve teamed up with Vidal Sassoon to take on the fun challenge of coloring my hair at home with their new Salonist hair color product. I chose Dark Red Violet 4/46 (eeek, talk about nervous!) but everything in the box provides professional tools (brush and a bowl) to achieve awesome results, so now you can color just like the pros!
The truth of the matter is, I’ve done at home color before and the results have left me with uneven color and eventually very dull looking hair. Unimpressive to say the least. So, over Christmas, I had it done professionally and was really happy with the outcome. It’s been about three months and my little brown roots are starting to show, so this project couldn’t have come at a better time!
My hair is naturally brown, so when it was colored a few months ago, I brightened it up a bit and went with a pretty purply-red. I loved it so much, that I decided to aim for a similar color this time around.
Something to remember when coloring your hair is, in order to achieve color that is full of depths and tones, it’s essential to treat roots and lengths separately since new hair growth and previously colored hair absorb color differently. Coloring also alters the pigment content, changing the hair’s surface structure and making it more porous. So since lengths have been colored up to 20x more than roots, the lengths require less dye.

One of the reasons I decided to give Salonist a try is because it features an innovative 2-step technique that leaves hair seamlessly blended, avoiding streaks and stripes. This was one of my main issues in the past when using at-home color kits. The two-step process brings you vibrant, multi-dimensional hair color with convenience, speed, and accuracy. So, with that said, here is a step-by-step of my experience with the product…

1. First off, make sure to wear the gloves! Then empty tube 1 and bottle 1 together in the Salonist bowl and mix until smooth.
2. Next, use the Salonist brush to apply the color cream to your roots, starting with your hair’s natural part. Continue all the way down the back of your head. Brush the color cream onto your hairline. Part your hair again, ½ -inch below your natural part, and brush color cream onto the roots. Repeat this process as many times as needed to completely cover your roots. Use approximately ¾ of the color cream in the bowl.
Oh my gaaawd, I’m really doing this!
3. Add the VS Serum into the ¼ of color cream still left in the Salonist bowl and mix well.
4. Scoop the mixture out with your hands and blend it throughout the lengths of your hair. Massage the color in all over, even at your roots. Allow it to sit for 30 minutes.
5. Rinse out the color, and wash your hair with a color-safe shampoo. Then apply the included Salonist Color Preserving Conditioner and let it absorb for 2 minutes.
Voila, all done, and so happy with my gorgeous results! Next up on the hair to-do list…a haircut!
A few more tips from the experts:
- The baby hairs around your hairline are weaker and softer and therefore develop faster than the hair around the crown. If you want even hair color, start coloring hair at the crown and then work your way out. Your hairline and bangs should be last. Just remember that application is key, otherwise you’ll be left with patchy hair color.
- Apply hair color like you’re unraveling or peeling an orange. Start by applying hair color at the crown and then take sections of hair and work clockwise. You’ll want to finish applying hair color around the nape and the hairline since those strands develop faster.
- To avoid hair color staining your skin, apply some Vaseline around your hairline.
- Here are a bunch of helpful videos from the site that you can watch if you are super visual like me!
You can get your very own kit of Salonist at Amazon.com or other major mass retailers. Check out VidalSassoon.com for more info!
P.S. I created a video documenting my step-by-step process on my YouTube channel, so if you’d like to see that as well, click here to take a look!


